Como adicionar um segundo monitor ao seu sistema de intercomunicador de vídeo: Um Guia Completo
Junho 25, 2025
Partilhar este artigo

1. O que é um sistema de intercomunicador de vídeo e porquê adicionar um segundo monitor?
A sistema de interfone de vídeo é uma solução de comunicação que permite a interação audiovisual entre espaços, normalmente utilizada em edifícios residenciais, complexos de escritórios e instalações comerciais. Os componentes principais incluem normalmente:
- Monitor interior (unidade principal): Instalado no interior do edifício para que os utilizadores possam ver e comunicar com o visitante.
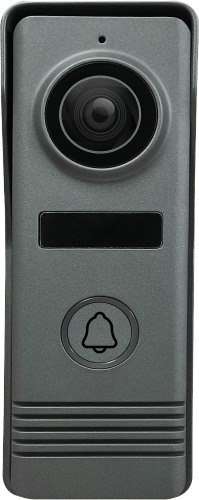
- Painel de exterior (Door Station): Colocado à entrada, equipado com uma câmara, um microfone, um altifalante e um botão de chamada.
- Unidade de alimentação eléctrica: Alimenta todo o sistema.
- Cablagem ou transmissores sem fios: Liga as unidades exteriores e interiores.
Porquê adicionar um segundo monitor?
A adição de um segundo monitor aumenta a acessibilidade e a comodidade, especialmente em casas maiores ou edifícios com vários pisos. Algumas das principais razões incluem:
- Acesso a várias salas: Atender a porta de qualquer parte da casa.
- Visualização flexível: Monitorize as entradas do andar de cima, da cozinha ou do seu escritório em casa.
- Segurança melhorada: Mais ecrãs significam mais pontos de vigilância.
- Familiar: Todos os membros da família podem utilizar o sistema a partir de um local próximo.
Cenários comuns de utilização de vários monitores
| Localização | Exemplo de Caso de Uso |
|---|---|
| Casas | Quarto no andar de cima, cozinha ou escritório em casa |
| Apartamentos | Monitor separado para cada residente |
| Caso de uso: aplicações comerciais | Receção e escritório do gerente’ |
| Clínicas médicas | Receção e posto de enfermagem |
| Fábricas | Sala de segurança e ponto de controlo da entrada principal |
2. Vantagens de uma configuração de intercomunicador vídeo com vários monitores
A implementação de um segundo monitor no seu sistema de intercomunicação pode aumentar significativamente a comodidade e a segurança. Aqui está um resumo dos benefícios:
cobertura de segurança reforçada
- Veja os visitantes a partir de vários locais.
- Monitorizar vários pontos de acesso em tempo real.
- Reduzir os ângulos mortos em casas ou edifícios de maiores dimensões.
🏠 Maior comodidade
- Evite atravessar a casa para atender o intercomunicador.
- Melhorar a acessibilidade para pessoas idosas ou com deficiências físicas.
- Comunicar entre salas (comunicação intercomunicador a intercomunicador).
👨👩👧👦 Operação amiga da família
- Permitir que crianças ou familiares idosos abram a porta sem supervisão.
- Vários utilizadores podem interagir com o sistema de forma independente.
eficiência na utilização comercial
- A rececionista e o pessoal de segurança podem monitorizar as entradas.
- Gestão mais rápida do acesso de visitantes em edifícios de escritórios.
- Ideal para edifícios de grandes dimensões ou propriedades com vários inquilinos.
Tabela de comparação de valores: Configuração de um ou vários monitores
| Caraterística | Monitor único | Multi-Monitor |
|---|---|---|
| Conveniência | limitado a um quarto | múltiplos pontos de acesso |
| Segurança | vista restrita | ✅ Melhor cobertura |
| Complexidade da instalação | ✅ Fácil | ⚠️ Moderado |
| Custo | ✅ Inferior | ⚠️ Moderado a elevado |
| Escalabilidade | não escalável | facilmente expansível |
| Acessibilidade para vários utilizadores | um utilizador de cada vez | acesso simultâneo |
3. Verificação de compatibilidade: O seu sistema está pronto para a expansão?
Antes de adicionar um segundo monitor, é crucial determinar se o seu sistema atual suporta configurações com vários monitores.
principais factores de compatibilidade a considerar
- Tipo de sistema (2 fios, 4 fios, baseado em IP)
- os sistemas de 2 e 4 fios podem ter opções de expansão limitadas.
- Os sistemas baseados em IP são mais flexíveis e escaláveis.
- Marca & Suporte do modelo
- Consulte o manual do utilizador ou o sítio Web do fabricante.
- Confirme se o seu modelo suporta ligação em cadeia ou nós adicionais.
- Capacidade da fonte de alimentação
- Certifique-se de que o seu adaptador de corrente pode suportar a procura de energia adicional.
- Poderá necessitar de uma fonte de alimentação (PSU) actualizada.
- Configuração do monitor mestre ou escravo
- Alguns sistemas permitem um monitor principal e vários monitores secundários.
- Os monitores escravos só podem receber chamadas, não as podem iniciar.
- Infraestrutura de cablagem
- Existe cablagem para ligar o segundo monitor?
- A instalação sem fios pode ser uma melhor alternativa em cenários de reabilitação.
🔍 Como verificar a compatibilidade do sistema
| Ponto de controlo | Como verificar |
|---|---|
| Manual do utilizador | Procure termos como "multi-monitor" ou "unidade escrava" |
| Website do fabricante | Pesquisar páginas de produtos e FAQ de apoio |
| Apoio ao cliente | Contactar o fornecedor para obter as especificações técnicas |
| Etiquetagem de produtos | Procurar números de modelo com "M" ou "S" |
| Fóruns/revistas online | Verificar as experiências dos utilizadores no mundo real |
Por exemplo, se estiver a utilizar um sistema da FARHDmuitos dos seus sistemas de intercomunicação de vivenda baseados em IP e de 4 fios suportam monitores adicionais como parte de uma configuração modular. A sua avançada I&D assegura uma expansão perfeita dentro do mesmo ecossistema, o que é ideal tanto para utilizadores residenciais como comerciais.

4. Guia passo-a-passo para adicionar um segundo monitor
Depois de ter verificado que o seu o sistema de vídeo porteiro suporta vários monitoreso passo seguinte é a instalação. O processo pode variar ligeiramente consoante o sistema seja com ou sem fios, mas os passos principais são semelhantes.
instalação passo-a-passo (sistema com fios)
- Desligar a alimentação
- Desligue sempre o sistema para evitar riscos eléctricos.
- Preparar o segundo monitor
- Retire o dispositivo da caixa e verifique se todos os componentes estão presentes.
- Monte o monitor na parede ou no local pretendido.
- Ligar a cablagem
- Utilize o tipo de cabo correto (normalmente 2 fios, 4 fios ou Cat5e/Cat6 para sistemas IP).
- Consulte o diagrama de cablagem fornecido pelo fabricante.
- Para sistemas de 4 fios: Ligar a alimentação (2 fios) + vídeo/áudio (2 fios).
- Atribuir endereço do monitor
- Alguns sistemas exigem que configure o segundo monitor como uma "unidade escrava"
- Isto é normalmente efectuado através de interruptores DIP ou de definições de software.
- Ligar e testar
- Ligar todo o sistema.
- Teste a comunicação entre a estação exterior e ambos os monitores.
- Certifique-se de que ambos os dispositivos tocam quando a campainha é premida e podem apresentar vídeo.
- Configurar funções de intercomunicação
- Ativar a comunicação entre monitores (se suportada).
- Ajustar as definições de brilho, volume e tom do ecrã.
📶 Instalação passo a passo (sistema sem fios)
- Ligar o segundo monitor
- Ligue ou carregue o seu monitor sem fios.
- Emparelhar com a unidade principal
- Utilize a aplicação do sistema ou a funcionalidade de emparelhamento incorporada.
- Certifique-se de que o segundo dispositivo está dentro do alcance sem fios.
- Atribuir função de dispositivo
- Definir o monitor como um ecrã secundário ou unidade "escrava".
- Testar todas as funções
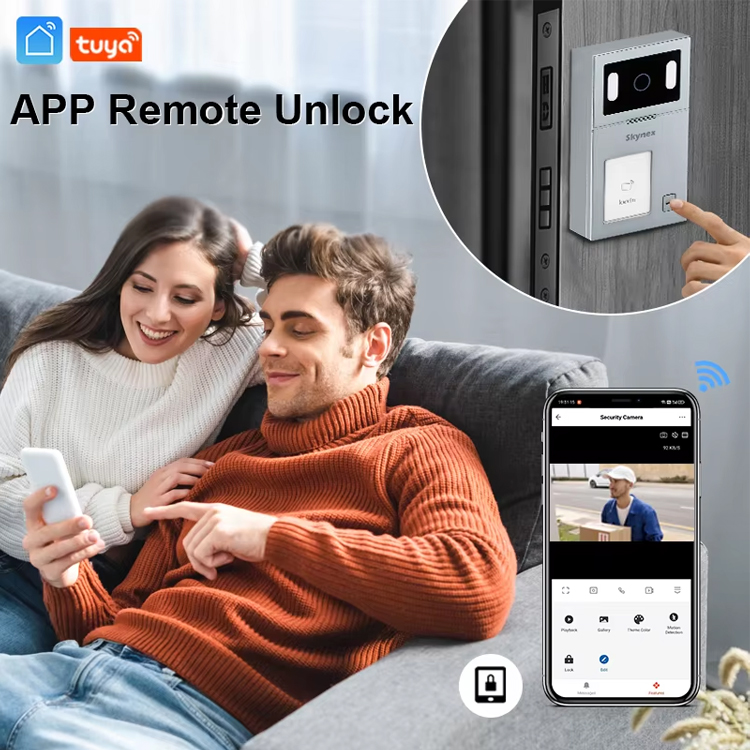
- Confirmar a transmissão de vídeo, a comunicação áudio e a função de desbloqueio remoto.
- Montar ou colocar o monitor
- Instalar numa parede ou colocar num suporte no local pretendido.
🧰 Ferramentas de que pode necessitar
| Ferramenta | Propósito |
|---|---|
| Conjunto de chaves de fenda | Montagem na parede e cablagem |
| Descascador de fios | Preparação dos cabos |
| Perfurador e buchas | Montagem do monitor |
| Multímetro | Verificação da tensão e das ligações |
| Testador de cabos de rede | Para sistemas baseados em IP |
💡 Sugestão: Se estiver a trabalhar com um fabricante como FARHDos seus sistemas OEM/ODM são frequentemente fornecidos com suporte modular plug-and-play para monitores adicionais, tornando a instalação mais eficiente e à prova de erros.
5. Extensão de monitor com fios ou sem fios: Qual é a mais adequada para si?
Ao adicionar um segundo monitor ao seu sistema de intercomunicador de vídeo, a escolha entre um com fio ou sem fios é fundamental. Cada uma tem os seus prós e contras, dependendo da estrutura do edifício, do orçamento e dos requisitos técnicos.
extensão do monitor sem fios
Prós:
- Mais fácil de instalar (ideal para reabilitações e apartamentos)
- Não é necessário instalar cabos adicionais
- Colocação e deslocalização flexíveis
- Compatível com a maioria dos ecossistemas domésticos inteligentes
Contras:
- Alcance limitado (afetado por paredes e interferências)
- Potencial para quedas de sinal ou atrasos
- Depende da qualidade da rede Wi-Fi
extensão do monitor com fios
Prós:
- Ligação estável e fiável
- Sem interferência ou perda de sinal
- Melhor qualidade de vídeo/áudio
- Não depende de Wi-Fi ou de redes sem fios
Contras:
- Instalação mais complexa
- Requer perfuração na parede e passagem de cabos
- Menor flexibilidade na colocação de monitores
⚖️ Tabela de comparação
| Caraterística | Sistema com fios | Sistema sem fios |
|---|---|---|
| Complexidade da instalação | ⚠️ Moderado a elevado | ✅ Fácil |
| Estabilidade do sinal | ✅ Excelente | ⚠️ Variável |
| Flexibilidade à distância | limitado por fio | alto (dentro do intervalo) |
| Custo | ⚠️ Moderado | ✅ Inferior (em retrofit) |
| Impacto Estético | ⚠️ Cablagem visível | configuração limpa |
| Caso de utilização ideal | Novos edifícios, moradias | Apartamentos, reabilitação |
🎯 Perceção do especialista: A FARHD propõe sistemas de videoporteiro com e sem fios. Os seus kits de vivenda de 4 fios são ideais para novas construções de casas, enquanto os seus modelos da série IP suportam monitores secundários com Wi-Fi. Saiba mais sobre os seus página do produto.
6. Os melhores sistemas de intercomunicação de vídeo compatíveis com vários monitores
Se está a pensar em atualizar ou substituir o seu sistema de intercomunicação existente para suportar vários monitores, eis alguns dos sistemas mais bem classificados que satisfazem as necessidades residenciais e empresariais.
os melhores sistemas de intercomunicação de vídeo com vários monitores
| Marca / Modelo | Suporta vários monitores | Tipo | Caraterísticas | Ideal para |
|---|---|---|---|---|
| Kit de vivenda de 4 fios FARHD | ✅ Sim | Com fio | Unidades exteriores modulares, expansíveis e anti-vandalismo | Moradias, casas novas |
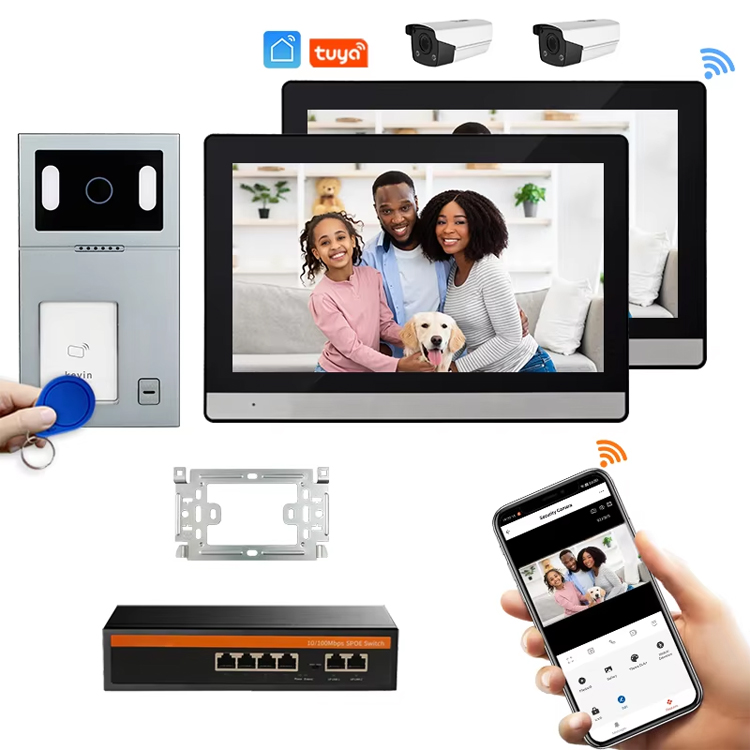
| Sistema de intercomunicação IP FARHD | ✅ Sim | IP/WiFi | Controlo por aplicações, deteção de movimento, armazenamento na nuvem | Casas e escritórios inteligentes |
| Hikvision DS-KH6320 | ✅ Sim | IP | Ecrã tátil, PoE, vários monitores escravos | Residencial, comercial |
| Aiphone JOS-1VW | ✅ Sim | Com fio | Expansível, montável na parede, mãos-livres | Apartamentos, casas |
| Comelit 6741W | ✅ Sim | IP | Wi-Fi, integração de aplicações, design minimalista | Casas modernas, condomínios |
✅ Porquê escolher a FARHD?
FARHD é um fabricante líder de intercomunicadores OEM/ODM com sede na China. Com I & amp; D integrado, produção interna de LCD e montagem completa do sistema, eles oferecem qualidade e escalabilidade incomparáveis. Os seus sistemas de intercomunicação já são populares em mais de 60% do mercado chinês e estão a ganhar força na Europa, Coreia e Turquia.
Para obter especificações pormenorizadas e opções de modelos, visite Sítio Web oficial do FARHD.
📈 Destaques do sistema FARHD
- Suporta até 4 monitores interiores por unidade
- Integração perfeita com controlo de acesso e sistemas domésticos inteligentes
- Ecrãs tácteis LCD de alta resolução
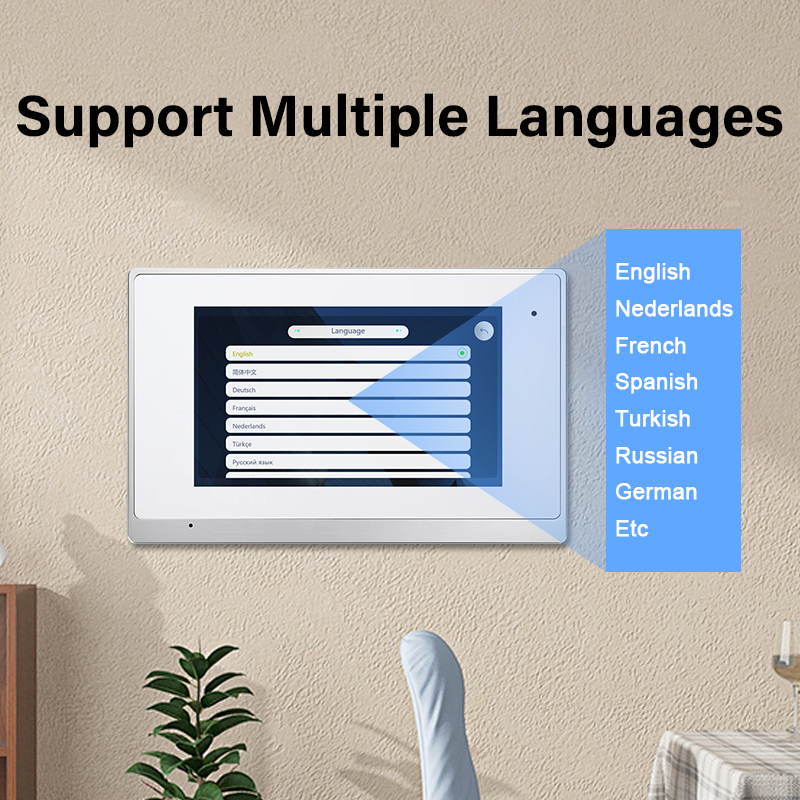
- IU multilingue para mercados internacionais
- Certificações CE, RoHS, FCC
procura uma marca personalizada ou compras a granel? Contacte a Equipa de vendas FARHD para preços B2B e soluções OEM/ODM.

7. Erros comuns a evitar ao instalar um segundo monitor
Embora a adição de um segundo monitor a um sistema de videoporteiro possa melhorar significativamente a eficiência de comunicação da sua casa ou edifício, existem várias armadilhas comuns que podem prejudicar o desempenho ou danificar o seu sistema. Veja a seguir o que deve ser observado:
erro n.º 1: Ignorar a compatibilidade do sistema
Problema: Nem todos os sistemas suportam vários monitores. A instalação de um monitor incompatível pode resultar numa falha do sistema ou numa funcionalidade parcial.
Solução:
- Verifique sempre as especificações do seu modelo de intercomunicador.
- Se utilizar sistemas FARHD, confirme a compatibilidade através dos respectivos especificações do produto.
erro #2: Fonte de alimentação com pouca potência
Problema: A adição de um segundo monitor aumenta o consumo de energia. Se a sua fonte de alimentação atual não conseguir suportar a carga, os dispositivos podem não ligar ou funcionar de forma inconsistente.
Solução:
- Actualize o seu adaptador de corrente, se necessário.
- Utilize os kits OEM da FARHD que incluem fontes de alimentação concebidas para configurações com vários monitores.
erro #3: Má gestão dos cabos
Problema: A cablagem exposta ou emaranhada pode causar:
- Interferência de sinal
- Danos físicos ao longo do tempo
- Instalações esteticamente desagradáveis
Solução:
- Utilize condutas de cabos ou passe por dentro das paredes.
- Etiquetar os cabos para futura resolução de problemas.
erro #4: Misturar marcas e modelos
Problema: Marcas diferentes podem não utilizar os mesmos protocolos de comunicação, mesmo que partilhem tipos de cablagem semelhantes.
Solução:
- Manter a mesma marca e a mesma família de produtos.
- Por exemplo, todos os monitores FARHD da mesma série são concebidos para serem interoperáveis.
erro #5: Endereçamento incorreto do monitor
Problema: Muitos sistemas exigem que cada monitor tenha uma identificação ou endereço exclusivo. Se não forem atribuídos endereços únicos, o sistema ficará confuso.
Solução:
- Utilize interruptores DIP ou software para atribuir adequadamente as funções "Master" e "Slave".
- Consulte o manual do utilizador ou o guia de instalação.
🛠️ Lista de verificação para uma instalação bem sucedida
- verificar se o sistema suporta vários monitores
- utilizar modelos de monitores compatíveis da mesma marca
- atualizar a PSU, se necessário, para carga adicional
- atribuir funções de monitor corretas (Mestre/Escravo)
- utilizar cabos e conectores de qualidade
- testar todas as funções de comunicação e desbloqueio
- etiquetar toda a cablagem para manutenção futura
8. Melhores práticas para a manutenção de intercomunicadores com vários monitores
Uma vez instalado o segundo monitor, a manutenção contínua garante um desempenho e fiabilidade a longo prazo. Quer seja um proprietário, gestor de propriedades ou integrador de sistemas, siga estas práticas recomendadas:
limpeza regular
- Utilize um pano de microfibras para limpar os ecrãs e as lentes das câmaras.
- Evitar produtos químicos agressivos que possam danificar os revestimentos antirreflexo.
actualizações de firmware
- Muitos sistemas de intercomunicação inteligentes, como os modelos IP da FARHD, suportam actualizações de firmware.
- As actualizações regulares corrigem erros, melhoram as funcionalidades e aumentam a segurança.
teste periódico de função
- Testar mensalmente a qualidade do áudio e do vídeo em todos os monitores.
- Acionar o mecanismo de desbloqueio da porta e confirmar o tempo de resposta.
otimização de Wi-Fi (para monitores sem fios)
- Evite colocar monitores sem fios perto de fontes metálicas ou de micro-ondas.
- Utilize um repetidor Wi-Fi se a intensidade do sinal for fraca em determinadas divisões.
inspeção da cablagem (para monitores com fios)
- Verificar se existem ligações soltas ou cabos envelhecidos a cada 6-12 meses.
- Substitua imediatamente quaisquer fios desgastados ou corroídos.
integração do controlo de acesso
- Se o seu sistema de intercomunicação incluir funcionalidades de abertura de portas, teste regularmente a fechadura eléctrica.
- Assegurar que os registos de acesso (para sistemas IP) estão a ser devidamente registados.
💼 Sugestão para compradores B2B: A FARHD oferece serviços de suporte e manutenção a longo prazo para clientes OEM/ODM, garantindo que as suas configurações com vários monitores permanecem funcionais mesmo em ambientes exigentes, como edifícios de escritórios e complexos de apartamentos. Saiba mais em Página sobre nós.

9. FAQ: Como adicionar monitores extras aos sistemas de intercomunicação por vídeo
posso acrescentar mais de dois monitores ao meu sistema de intercomunicação?
Sim, muitos sistemas permitem até 4 monitores interiores. Por exemplo, a série de intercomunicadores IP da FARHD suporta até 4 monitores por estação de porta.
todos os monitores tocam quando alguém carrega na campainha?
Se configurado corretamente, sim. Todos os monitores ligados devem tocar e apresentar a transmissão de vídeo em direto quando a unidade exterior é acionada.
posso instalar o segundo monitor sozinho ou preciso de um técnico?
Se se sentir à vontade com a cablagem e a configuração básicas, pode fazer você mesmo. No entanto, recomenda-se a instalação profissional para sistemas maiores ou baseados em IP.
a adição de um segundo monitor vai tornar o meu sistema mais lento?
Não se for instalado corretamente. Certifique-se de que a fonte de alimentação e a cablagem são adequadas para evitar quedas de desempenho.
os monitores sem fios funcionam de forma tão fiável como os monitores com fios?
Os monitores sem fios oferecem comodidade, mas podem sofrer interferências de sinal ou problemas de alcance. Os sistemas com fios são geralmente mais estáveis.
posso utilizar monitores de marcas diferentes em conjunto?
Não recomendado. Os protocolos de comunicação diferem consoante as marcas. Mantenha-se fiel a um fabricante para garantir a compatibilidade total.
quem é o melhor fabricante de sistemas de intercomunicadores vídeo expansíveis?
FARHD é um dos fabricantes OEM/ODM mais fiáveis, especializado em soluções de intercomunicação escaláveis. Com mais de 60% de quota de mercado na China e uma presença global crescente, a FARHD fornece:
- Controlo total da cadeia de fornecimento (LCD, câmara, software, caixa)
- Marca personalizada, etiqueta branca e serviços OEM/ODM
- I&D avançado para integração de casas inteligentes prontas para o futuro
para soluções personalizadas ou encomendas em massa, contacte a equipa através do Página de contacto hoje.
🏁 Considerações finais: Melhore o seu sistema de intercomunicação com um segundo monitor
Adicionar um segundo monitor ao seu sistema de videoporteiro é um investimento inteligente em termos de conveniência e segurança. Quer seja proprietário de uma casa, gestor de propriedades ou distribuidor B2B, é fundamental assegurar uma instalação correta e escolher o equipamento certo.
Se está à procura de um solução de intercomunicador vídeo fiável, escalável e de alta qualidadeconsidere trabalhar com FARHD. Com fabrico próprio, décadas de experiência e uma forte reputação nos mercados nacional e internacional, a FARHD é o seu parceiro para tudo, desde instalações unifamiliares a projectos comerciais de grande escala.
Também pode interessar-lhe
-
Intercom with Screen: Features, Benefits, and Top Suppliers for 2025
What is an Intercom with Screen and How Does It Work? An intercom with screen, also known as a video door phone or video intercom system, is an advanced communication solution that combines audio and visual capabilities to allow users to see and talk to visitors before granting access to a building or property. It…
-
How to Choose the Best Wireless Doorbell with Speaker and Camera for 2025
1. What is a Wireless Doorbell with Speaker and Camera? A wireless doorbell with speaker and camera is a modern security solution that combines video, audio, and wireless communication to enable real-time two-way communication between the person at the door and the property owner or manager. These systems are popular in both residential and commercial…
-
WiFi Video Door Phone Intercom: Smart Entry Solutions for Homes & Businesses
1. What is a WiFi Video Door Phone Intercom and How Does It Work? A WiFi video door phone intercom is a smart communication system that enables audio-visual interaction between a visitor at the door and the person inside a building, using a wireless internet connection. These systems are widely used in residential homes, apartments,…
-
Best Smart Doorbell with 2-Way Audio: Features, Benefits, and Top Picks
What is a Smart Doorbell with 2-Way Audio and How Does It Work? A smart doorbell with 2-way audio is an advanced security device that allows homeowners and businesses to see, hear, and talk to visitors at their door through a mobile app or smart display. This feature transforms a traditional doorbell into a real-time…